Simple single file PHP visitor counter. Put it to your website PHP code folder and you are ready to go. This counter is just for personal or small scale websites.
This site is using this code now, you can check the footer of this site.
Features
Pure PHP, No other lib required, No configuration required
Fast, Simple and Easy to use
No database required, visitor’s data store in a csv file
File size is less than 5kb
How to use
Learn how to use this counter
Requirement
PHP7 and above
Write permission of the counter log file
1
2
3
#in the same directory as vcounter.php or your can define your csv file folder
touch vstCnt.txt
sudo chmod 666 vstCnt.txt
Installation
Just put vcounter.php in your php src folder or wherever place it can be runned
In the homepage or the page need to count the visitor just try the following method to use it
For the personal website like this site, if you want to secure your website, there is a free Let’s Encrypt SSL certificate you can choose.
On CentOS7 and the web server is Nginx, you can install Let’s Encrypt SSL certificate by the following steps:
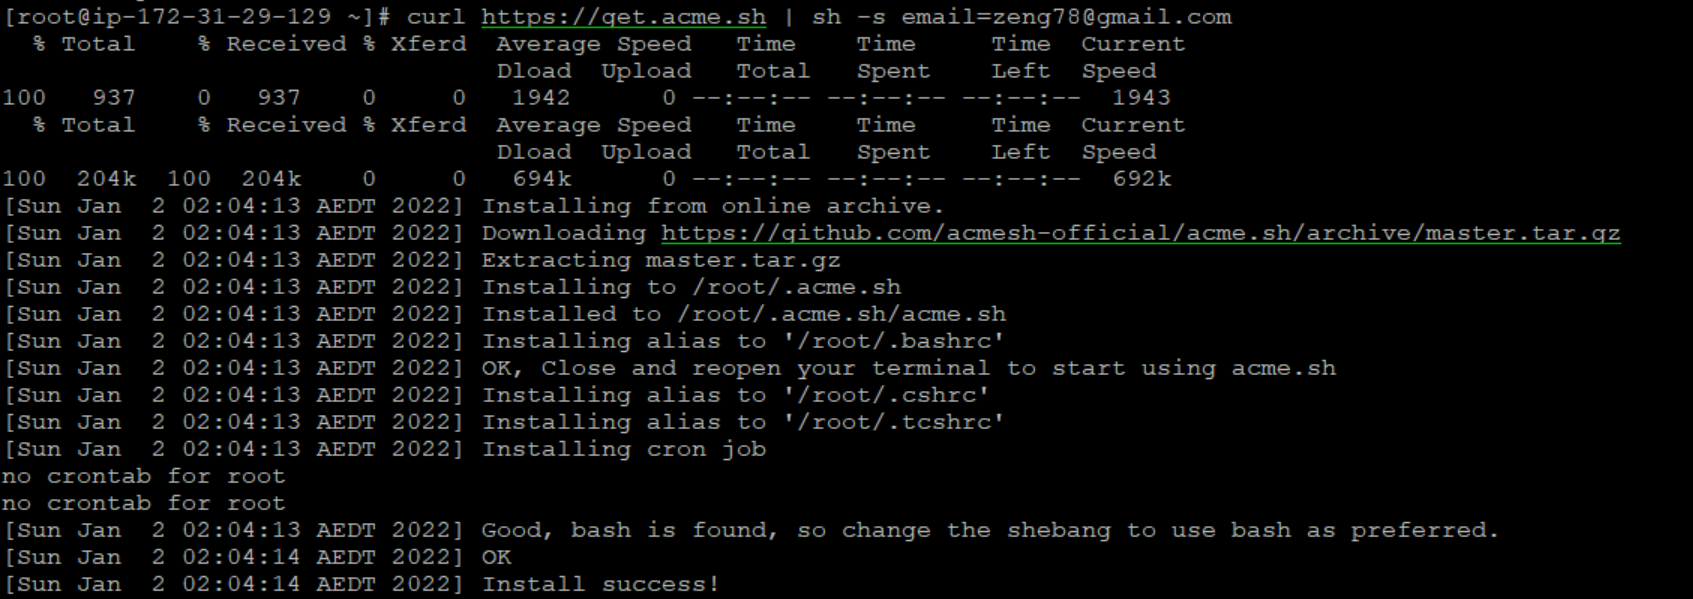
Install acme.sh
Why choose this and not the official recommended certbot , because certbot need to install snapd first, and it is not easy to install on CentOS7. It will install a squashfs on your system, but on my CentOS7 after installed , system will not boot up. So I choose this acme.sh. to complete this installation.
[[email protected] ~]# acme.sh --issue -d jichiduo.com -d www.jichiduo.com --webroot /var/www/jichiduo/
Sleep 10 and retry.
Using CA: https://acme.zerossl.com/v2/DV90
Create account key ok.
No EAB credentials found for ZeroSSL, let's get one
Registering account: https://acme.zerossl.com/v2/DV90
Registered
ACCOUNT_THUMBPRINT='mQBmCPjJMynTXXDo7WhlbtnhmJ3jN8zIUv3mf9P7DBk'
Creating domain key
The domain key is here: /root/.acme.sh/jichiduo.com/jichiduo.com.key
Multi domain='DNS:jichiduo.com,DNS:www.jichiduo.com'
Getting domain auth token for each domain
Getting webroot for domain='jichiduo.com'
Getting webroot for domain='www.jichiduo.com'
Verifying: jichiduo.com
Processing, The CA is processing your order, please just wait. (1/30)
Success
Verifying: www.jichiduo.com
Processing, The CA is processing your order, please just wait. (1/30)
Success
Verify finished, start to sign.
Lets finalize the order.
Le_OrderFinalize='https://acme.zerossl.com/v2/DV90/order/pBw-Xmw4uGoEhsQymi2E4g/finalize'
Order status is processing, lets sleep and retry.
Retry after: 15
Polling order status: https://acme.zerossl.com/v2/DV90/order/pBw-Xmw4uGoEhsQymi2E4g
Downloading cert.
Le_LinkCert='https://acme.zerossl.com/v2/DV90/cert/cHjNdPdEP8Ef27UeiPY65A'
Cert success.
-----BEGIN CERTIFICATE-----
certificate content
-----END CERTIFICATE-----
Your cert is in: /root/.acme.sh/jichiduo.com/jichiduo.com.cer
Your cert key is in: /root/.acme.sh/jichiduo.com/jichiduo.com.key
The intermediate CA cert is in: /root/.acme.sh/jichiduo.com/ca.cer
And the full chain certs is there: /root/.acme.sh/jichiduo.com/fullchain.cer
Aws only provide one way to connect to Linux defaultly, it is through SSH by certificate, but the aws generated certificate is in OpenSSH format(in pem format), which is not supported by commonly used SSH client Putty(in ppk format). So we need to use PuttyGen to convert the certificate to PEM format.
Download Putty
You need to download the Putty MSI installer and install it.
Covert the certificate
You can generate the certificate by using the following steps:
From the Start menu, choose All Programs, PuTTY, PuTTYgen.
Under Type of key to generate, choose RSA. If your version of PuTTYgen does not include this option, choose SSH-2 RSA.
Choose Load. By default, PuTTYgen displays only files with the extension .ppk. To locate your .pem file, choose the option to display files of all types.
Select your .pem file for the key pair that you specified when you launched your instance and choose Open. PuTTYgen displays a notice that the .pem file was successfully imported. Choose OK.
To save the key in the format that PuTTY can use, choose Save private key. PuTTYgen displays a warning about saving the key without a passphrase. Choose Yes.
Specify the same name for the key that you used for the key pair (for example, my-key-pair) and choose Save. PuTTY automatically adds the .ppk file extension.
If you want to auto populate certain data to new sheet in Excel, you can use the following method. you can download the example file here.
Data table define
Init data
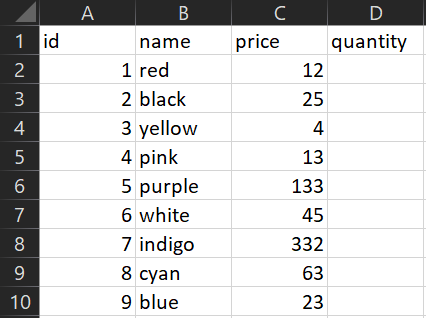
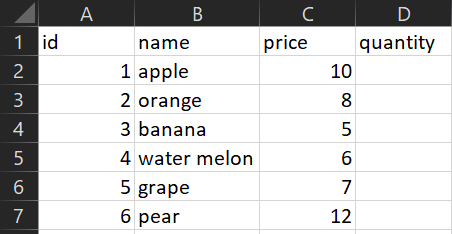
Asssume you have an excel file contains two sheets named “Sheet1” and “Sheet2” All sheets have the same title row id, name, price, quantity we will fetch all quantity > 0 row to a new sheet named “Sheet3”